iPhone Compass Confusion

Taking the iPhone 3GS on the subway will repeatedly get its compass all out of whack. It sits and spins in all directions. Eventually it produces this screen:

Compass Interference

I don't know how the compass works in the phone. But I'd venture a guess that the big, giant electrified track might have something to do with the "Interference" referenced in the alert.

Fun stuff. Love the figure 8. Very classy.

Is that, like, a nautical thing?

Upgrading from the 1st Gen iPhone to the 3GS

Much of the press surrounding the iPhone 3GS deals with whether or not this is a compelling upgrade to the 3G iPhone. No one is really comparing it much to the 1st Generation iPhone, which is what I'm upgrading from.

Some write-ups are describing the iPhone 3GS as "evolutionary, but not revolutionary." Funny, 'cause that was how I felt (and what a lot of people wrote) when the 3G came out. It didn't seem like a big, huge leap forward from my 1st Gen model, and in terms of battery life it was actually a step backwards. So I stuck it out and waited for the next, next version. And now it's here.
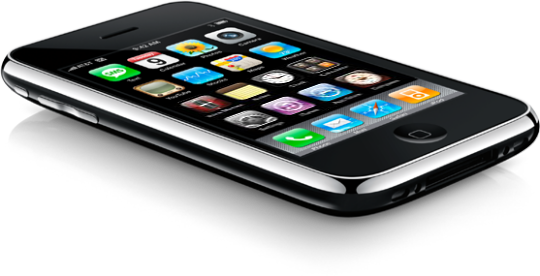
The iPhone 3GS

While going from the 3G to the 3GS might seem like a mere evolutionary step, going from a 1st Gen iPhone to a 3GS feels like evolutionary leapfrog. Like when proto-humans discovered that big, black monolith and suddenly got the idea for tools and beating the tar out of each other. It's big, my friends, for me anyway.

In addition to all the cool new stuff you've been reading about, new for me is also GPS and faster network access thanks to the addition of 3G, and the new (again, to me) case style, which I must admit I love the feel of despite preferring the look of the 1st Gen's metal back. The plastic model feels almost perfect in your hand. The way the edges are tapered gives the phone a light, comfortable handling, and the texture of the plastic should keep me (and my mom) from dropping the damn thing so much. These models make the 1st Gens feel clumsy and awkward by comparison.

But the real reasons I've upgraded — the real evolutionary jumps for me, the things I've been longing for the most — are:

  • Improved call quality
  • Performance
  • Video

Two of these represent, to me, the most annoying things about my current iPhone — the crappy call quality and the glacial speed with which applications open. The last, video, is just something I've wanted for a long, long time. Just something cool. Let me just talk briefly about each.

Improved Call Quality

Though it didn't bother me at first, so enamored of my iPhone was I, the call quality on my 1st Gen really leaves much to be desired. Which is a nice way of saying it sucks ass. Audio drops out as a matter of course on pretty much every call. And it seems to be more the phone's issue than AT&T's as it even happens during the ring period before the person I'm calling picks up. This makes simply ordering delivery torturous, and now I'm so instantly cranky whenever I'm on the phone that all my friends think I hate them. (I don't hate you, friends, I promise!)
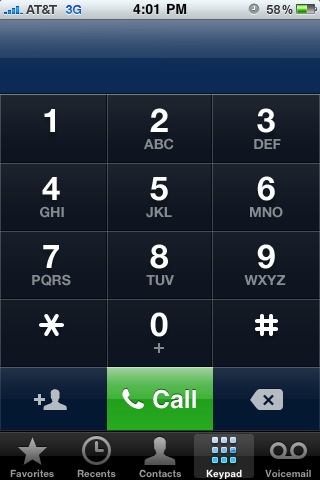
Call Quality Improvement Slight

Results

So far I'd describe the improvement in call quality as marginal at best. The 3GS is a bit louder than my old phone, and that helps. But the dropouts still occur, and that's disappointing. I was really hoping the call quality was appreciably better on the 3GS as it's one of my least favorite things about my 1st Gen. This is something I'll have to suss out more over time. But overall I'd say the gain here is only a slight one. Disappointing.

Performance

When the Notes application takes 20 seconds to launch, you know your computing device is slow. This may well be due to the fact that I have so many damned notes in there, sure. But that only underscores my need for speed. Maybe when the phone was new and not laden with data I could get away with the slower hardware. But it's not so data-free now, and that's not going to change. So it's great that Apple's focused on speed for this model. It's been another big aggravation as my iPhone use has matured. And not just in Notes, but in Safari, Contacts and the Camera as well. These are apps in which a lack of speed gets annoying fast. I mean, uh, quickly.

Battery life is also a crucial part of performance (or I'll lump it in with performance for lack of a better place), and a big reason I didn't upgrade to the 3G. As I alluded to earlier, battery life in the 3G was actually inferior to the 1st Gen models. I can get by fine as long as my battery lasts a full day; I don't mind charging every night. But the 3G, by most accounts, often needed charging before day's end. And while I could get used to it, I'd rather not.
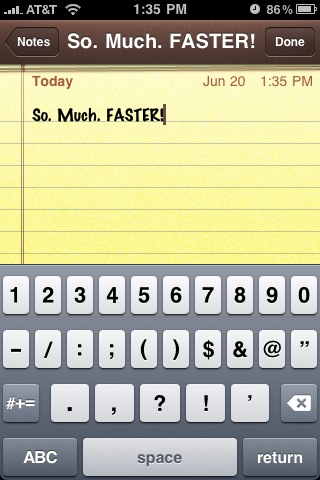
Notes: Immediate Access

Results

Well, again, it remains to be seen whether performance decreases as I continue to use the device. But so far I'm very pleased to report that the performance gains going from a 1st Gen iPhone to the 3GS are significant. I can begin editing notes now immediately after launching the application — I'd call zero seconds down from 20 a big gain. All my applications, in fact, launch much more quickly. And browsing the web in Safari is much faster than it used to be, both because of the hardware improvements and because I'm now on 3G. Many things that were just impractical before — like finding something in the Maps application, which used to be so slow I'd stopped using it unless I was on WiFi — are now acceptably fast. Sometimes even pleasantly speedy. Though I don't need to reboot very often, it's nice to see that even boot times are much faster — my phone boots in about 22 seconds. And, fortunately, as reported, the 3GS's battery, like my trusty 1st Gen, seems to regularly make it to bedtime without much trouble. Overall, I'd say the performance gains are a huge win when comparing the 3GS to the 1st Gen model.

Video

Long ago I opined the iPhone's lack of video capabilities (and then ran out and bought a Flip Mino HD). It always seemed like something Apple could have included as a software update. But as the updates have progressed this looks not to be the case (or at least not something that's ever going to happen, for, I'm assuming, good reasons). Alas, in the end, video acquisition on the iPhone requires a hardware update. And now that it's here I can finally leave the Flip at home from now on. Video's become just one more thing I can do without the need for an extra device. My pockets are so empty these days!
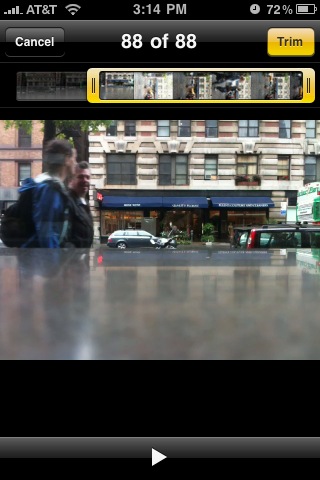
Video Shooting and Editing

Results

The video produced by the iPhone 3GS is surprisingly good in my initial tests. Though it's not HD, compared to the Flip the color is quite good. And it seems to handle both camera and subject movement — big problems on the Mino HD — pretty well. Don't get me wrong. This is still a phone camera. But it's easily the best phone camera for video I've ever seen. And the editing and upload capabilities make it all the more fun. But more than anything, it's the convenience of having decent video in your pocket at all times that makes this a great feature. I'm pretty excited to start really shooting more with this thing. Its ubiquity may just make it my primary video camera. Another big win for the 3GS.

Anyone want to buy a Mino?

Other Upgrade Faves

CalDAV calendar access in iCal Mobile

I've been wanting this for a while. I've been using the sync function in iTunes in the interim. But CalDAV support on the phone — in fact, CalDAV support everywhere — is just the right way to do this.
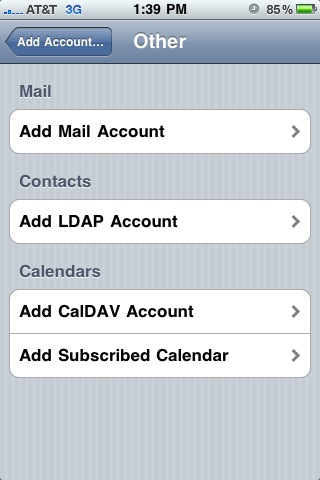
CalDAV: The Way to Go

Search! Everywhere and Anywhere

This is one of those features that, after a while, you start wishing you had. You don't notice it at first, but the more you start using your phone like the computing device it is, the more you start drawing comparisons to computers, not phones. That's the point at which certain inequities become increasingly obvious and painful. So it is with Search. It was great when we got it in Contacts. But having it one place only made me crave it in others. Glad it's finally here.
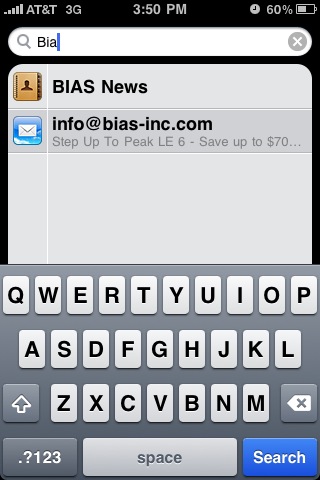
Search with Spotlight

Cut, Copy, Paste (of course)

I will say, I've been fine without this feature until fairly recently as well. In fact the timing of all this stuff is pretty good from where I sit. The 1st Gen iPhone was good enough to keep me busy and happy for the past two years, and only in the last few months of those two years have I really started to long for things like Search and Cut, Copy, Paste. Again, as I use my phone more and more like a computer, these things become more important.
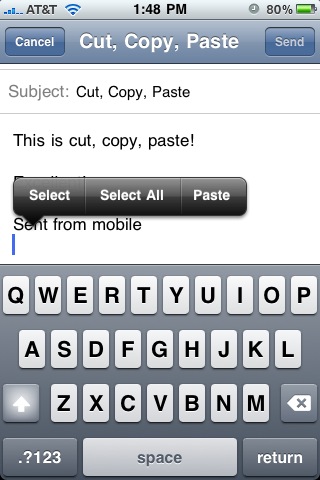
Copy & Paste

Undo

What computer would be complete without an undo feature? Well, iPhones have been for some time now. But no longer. Undo is here and it's even fun! Just shake to activate. (No, the phone, silly!)
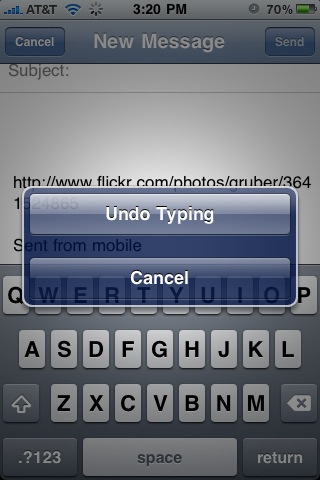
Undo

Camera Roll

New to the Camera Roll, both when accessing it from the Camera or from the Photos app, is the ability to multiple-select items for sharing, deleting or copying. It's a nice implementation, and something I turn out to be using a lot, especially as I write this article.
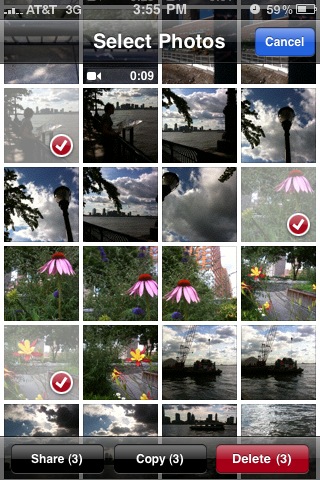
Camera Roll

Macro, Focus and Exposure Control

The camera in the iPhone 3GS now features focus and exposure control, which will really help make photos look a lot nicer and add to the types of photos you can take with the phone. And the macro ability adds a great deal of functionality. Ever try to take a close-up with the original iPhone camera? Blur city! Now you can take photos of printed text, computer monitors and yes, even bugs. Okay, maybe not tiny bugs. But probably big ol' water bugs.

Focus & Depth of Field

Compass

Folks outside of New York might not appreciate the compass in and of itself, but if you ever have to take a subway in this town you know that disoriented feeling you get when you step out of the station into the daylight. "Okay," you think to yourself, "Which way is north." Any New Yorker can find her way with that simple piece of information, but sometimes getting it requires walking a block in the wrong direction, and if you're anywhere south of Houston, god help you. Well, no more! From here on out, discombobulated commuters will simply activate the compass on their iPhones and be on their merry ways. And that's all we ever really wanted.
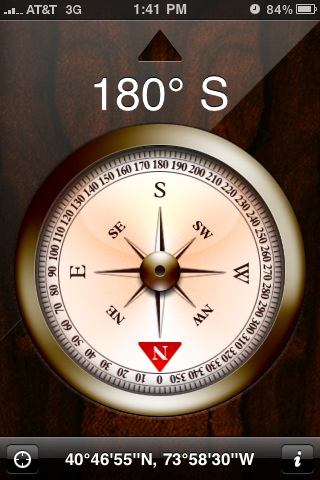
Compass

Maps Reborn

Maps, combined with the new compass and the new (to me) 3G are a whole new, wonderful ballgame for me now. I've already used Maps a couple times now, both to find places and to orient myself. It's fantastic!
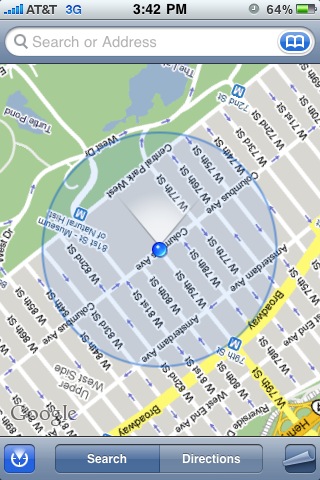
Fast Directional Maps

What's Old is New Again

So, am I happy with my new phone? Yes. Very.

Am I ecstatic?

Here's the thing. On the whole, after transferring over all my apps and information, the iPhone 3GS is, in more ways than not, the same phone as my 1st Gen. I'd say 75-80 percent of what I do with my phone and how I use it will remain unchanged. I mean, there's just not much that can compare to your first iPhone experience, right? After that, nothing seems radical. But least of all a phone that looks and feels almost identical to your last one, that has mainly the same set of features, and whose improvements are mostly on the inside. It does all the same stuff, it just does it a lot better.

Overall the iPhone 3GS is a big step up for me. And while call quality could still be a lot better, this upgrade addresses two of my biggest complaints about my last model with aplomb: the slowness and the lack of video. And that alone makes upgrading worthwhile to me. The other improvements, partly due to software updates I could have gotten on my old phone, are great and help make the entire experience very satisfying. It's very much like getting a faster computer. It's the same sort of feeling. It's a refresh of a product you've know and loved for years.

It's the same thing, only better. And it was already so good.

Hudzee

Or is it Hudzee?

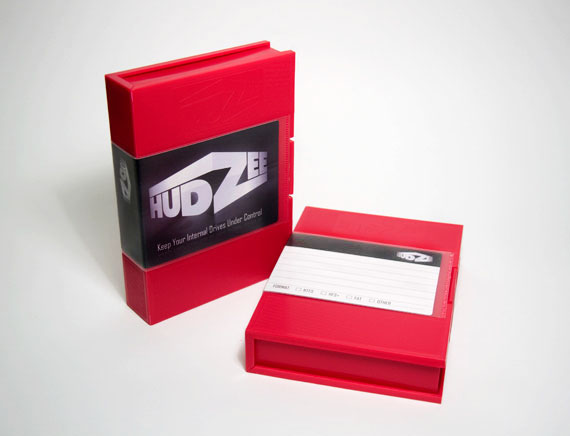
A friend of mine is trying his hand at product creation. Based on his 15+ years of systems experience in the world of commercial video production he's determined a burgeoning need for storage storage: a case for your hard drives.

Hudzee: Pretty and Smart

See, hard drives have become so cheap that they're actually the best per-gigabyte bang for your buck when it comes to data storage. So more and more clients are simply archiving everything to standard, internal ATA hard drives. Once a project's done, pull the drive from the machine or (firewire case) and stick it on a shelf. Many of my friend's clients have stacks of these drives, wrapped in anti-static bags, piled one on top of another on a shelf in some closet somewhere. It's an ugly way to treat your drives, and, moreover, it's not necessarily the safest way either.

Enter Hudzee. (Or is it Hudzee?)

Hudzee is a tape case for your hard drive. Remember tape? Back in the day it's what we stored all our video on. It's also what we used to archive data. It's slow and expensive, but it's very good for archiving. And it's slowly going the way of the dodo. But the thing about tapes is that every tape you bought — whether for data storage or video — came with something no hard drive does: A case. A nice, big, cushioned, stackable, hard, plastic case. Hudzee is just such a beast only sized precisely for your hard drive.

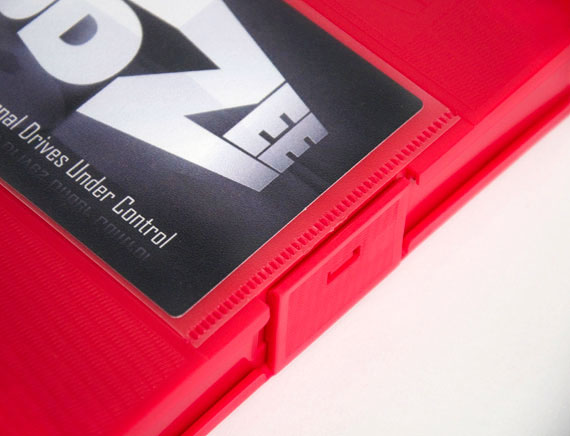
Hudzee: Latchable Goodness

Now I will say, Hudzee's creator is a friend of mine. And I'm obviously motivated by my desire to see him succeed. But I also have to say, I think that Hudzee is a great idea. I've just received my first production unit. The build quality is nice. The materials are solid, and plenty strong to safely hold a standard, 3.5" hard drive, and there is plenty of cushioning inside. A solid, but easy-to-open, latch keeps the case securely shut. My drive feels safe in here. Safer than it's ever felt before.

The other great thing about the Hudzee is that, like tape cases of yore, it features a label card. Finally, you can know what's on that drive without putting it back in the machine. Or, worse, labeling it with tape or some such sticky nastiness. Now a simple glance at the case is all you need.

So if you've got — or will have — a stack of hard drives sitting on a shelf in some back room somewhere, you might consider getting some Hudzee. (Or is it Hudzees?) They're $8 bucks a pop, or $65 bucks for a box of 10. Cheap compared to the price of a hard drive. Absolute chump change compared to the pricelessness of your data.

Order some online today. You know you want to.

Mom-Friendly PhotoBooth Post

Hello, and happy Mother's Day!

My mom recently switched over to the Mac platform, and she wanted to take a photo for me. I told her she could use the built-in iSight camera and PhotoBooth on her MacBook Pro to take the shot, but she couldn't figure out how to do it.

No problem, Mom. Let me see if I can help you out.

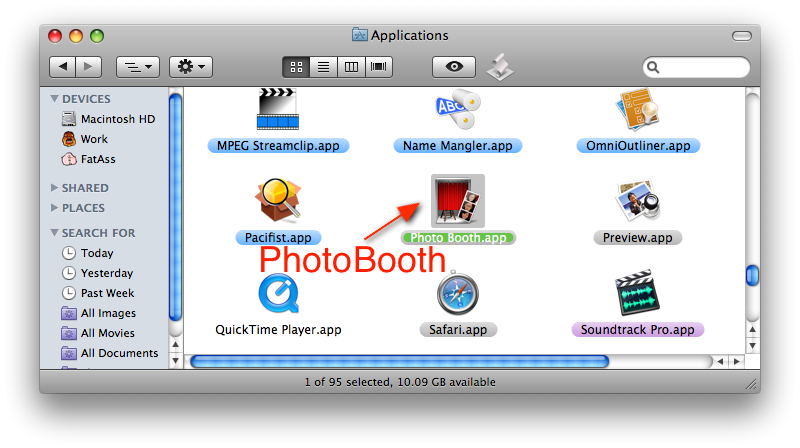
My guess is that you're still a little unfamiliar with where to find applications on the Mac. This is pretty typical of switchers. All your applications are in a folder aptly named "Applications" at the top level of your hard drive. That's the silvery-gray thing on your Desktop. It's probably called "Macintosh HD."

Your Hard Drive: Double-Click to Open

Open it up by double-clicking it.

A window should open with a folder inside it called "Applications." Open that as well with a double-click.

Hard Drive Items

Now you should see a fairly lengthy list of items. These are all your applications. Some items in this list are the actual, executable applications themselves. Some are folders that contain the applications. Sometimes it's hard to tell the difference. Fortunatly, PhotoBooth is easy: Scroll down until you see the item named "PhotoBooth," and — yup, you got it — double-click it to open it.

Applications

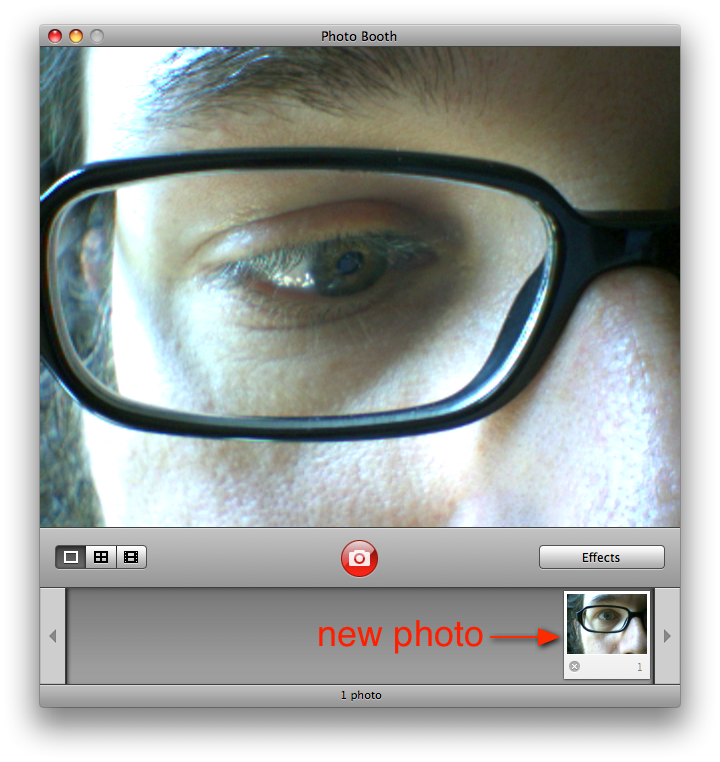
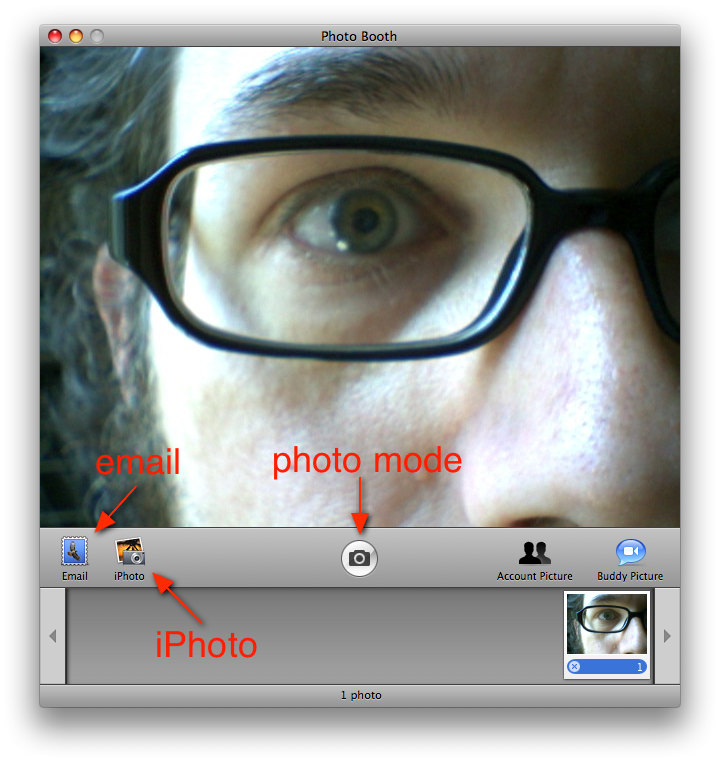
You should now be staring at an interface, at the center of which should appear your very own face. This is because the camera is now active and PhotoBooth is showing you what it sees. Since the camera is located at the top center edge of the computer display screen, it sees you.

PhotBooth: Photo Mode

To take a picture, simply press the red button. A short countdown will occur, a flash and then, voila! A picture will appear at the bottom of the  PhotoBooth interface. To look at the picture, simply click it once and it will appear in the main frame of the application window.

PhotBooth: View Mode

From this viewing mode you can email the picture by pressing the "Email" button on the left hand side of the tool bar towards the bottom of the application window.

PhotoBooth: View Mode

To switch back to photo mode, press the round camera button in the center of the tool bar and continue taking photos to your heart's content. Photos can also be dragged directly from the strip of shots at the bottom of the window to anywhere you'd want to put them: the Desktop, an email, wherever. You can also arrange them in iPhoto if you want, by pressing the iPhoto button. But I'll leave it for you to explore beyond that.

Hopefully this will help you out, Mom. If not we can go over it next time we see each other.

Enjoy your Mac!

Finder Burn Folders, Data Loss and Recovery

Burn Folders are special folders you can create in the Mac OS X Finder for burning data to optical media — CDs and DVDs. But the way they're implemented can be confusing, and that confusion can lead to data loss. Fortunately, there are ways to recover.

Burn Folder

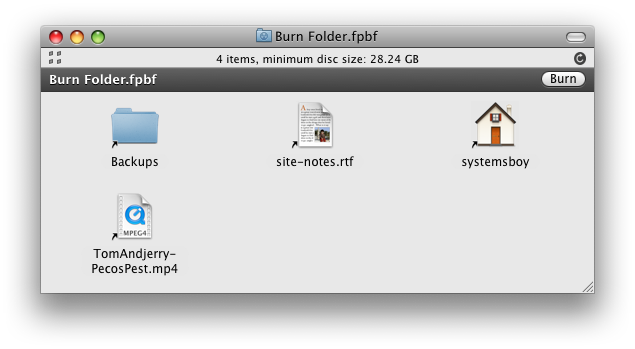
Creating a Burn Folder is easy; simply choose "New Burn Folder" from the Finder's File menu. This will create "Burn Folder.fpbf" on the Desktop, from which you can burn data to an optical disc. Dragging items to this folder will create aliases to those items rather than actually copying the data. This saves time and prevents the unnecessary duplication of data. Unfortunately, unless you know that Burn Folders are populated with aliases, and you know exactly how those aliases work, it can also lead to some confusion, and this confusion can get you in to trouble.

Inside a Burn Folder: Aliases

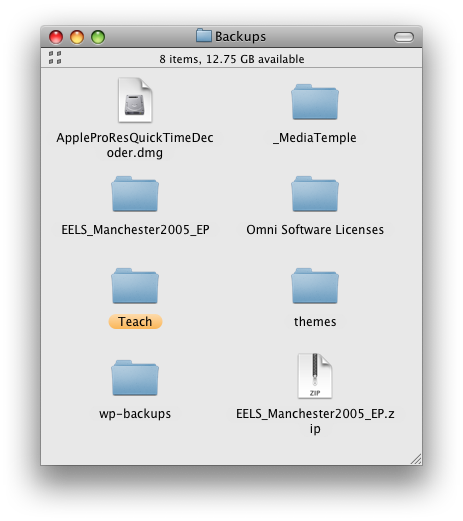
To wit: Let's say I create my Burn Folder. I start dragging files to it. Some folders too. Finally I finish and go to burn my disc, but I'm told that I have too much data in my Burn Folder, and that I need to remove some in order to make it fit on my media. Great. So I open up my Burn Folder. Inside are some smallish files, and a folder called "Backups" that holds the bulk of my intended burn data. So I open up Backups and start trashing files. Eventually the Burn Folder becomes small enough to fit on my optical disc. I burn the disc and then empty the Trash.

Subtle Signs: The Missing Gray Banner and Alias Arrows

Later I return to my Backups folder to find that when I emptied the Trash it deleted the actual data from Backups. Wait, what? How did that happen?

Well, if you recall, everything in my Burn Folder is an alias. Actually, that's not quite accurate. Everything at the top level of my Burn Folder is an alias. This means that when I opened the alias to the Backups folder it opened the actual Backups folder. And so, once in this folder, when I began deleting files I was deleting the actual data.

Dude. That is so not cool.

See, the way I see it there are a few problems with how all this works. First and foremost, the Finder is for people who aren't particularly concerned with how the Finder works, and Burn Folders should be geared towards the same folks. These folks may or may not know exactly how an alias works either, or even why it exists. But this lack of knowledge should never, ever lead to data loss under ordinary use-cases, particularly those in which the user is actually trying to make a fucking backup. Ever. Period.

Second, this method violates two preexisting paradigms, one of which belongs to Apple themselves, and the other of which has been around since the beginning of burning optical media. This first method to which I refer is Apple's Panther Finder. In Panther (and yes, this is just one more reason to loathe Tiger) the Finder would copy the data to the Burn Folder. Yes, this would take more time and create redundant data. But it also protected that data from deletion and was a much closer analog of what was actually going on: I put data in a Burn Folder, and now that data — not pointers to the data — is there in that Burn Folder. What we have now is confusing — some items in the folder are aliases, and some aren't — and, once again, can lead to data loss. And, as we all know by now, that's, uh, what's the word? Right. Bad.

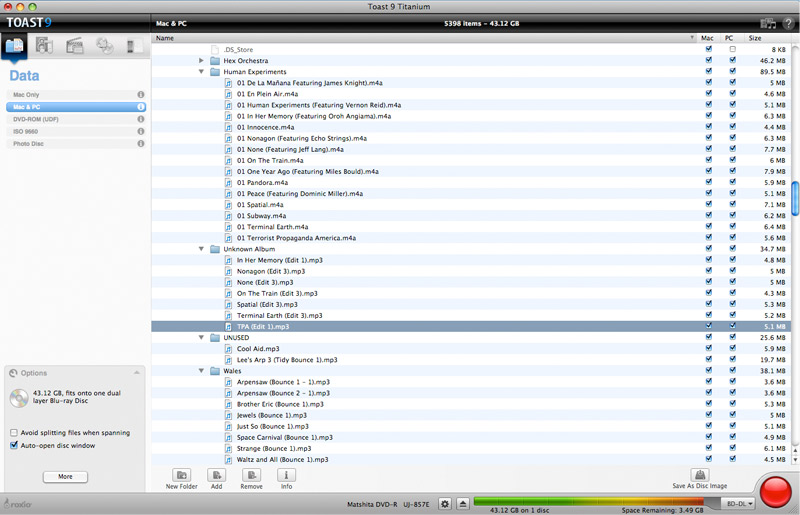
The other method I refer to comes from a little application called Toast. For forever and a day, Toast has simply pointed to the referenced data on disc, but has lacked any ability to actually affect that data. And why would it? Toast is not a file manager, it's a disc burning utility, and you can't delete data from your disc burning utility. One of the problems with the current method is that it puts data burning and file management in the same application when they probably should be separated. This is why burning data from the Finder has always seemed aberrant to me. It's just the wrong application for the job.

Toast: It Won't Delete Your Data

The knowledge of these preexisting methods can further confuse even the tech-savviest. In fact, when the aforementioned scenario actually happened to someone I know, it took a great deal of time for me just to suss out what had occurred. It just shouldn't be possible.

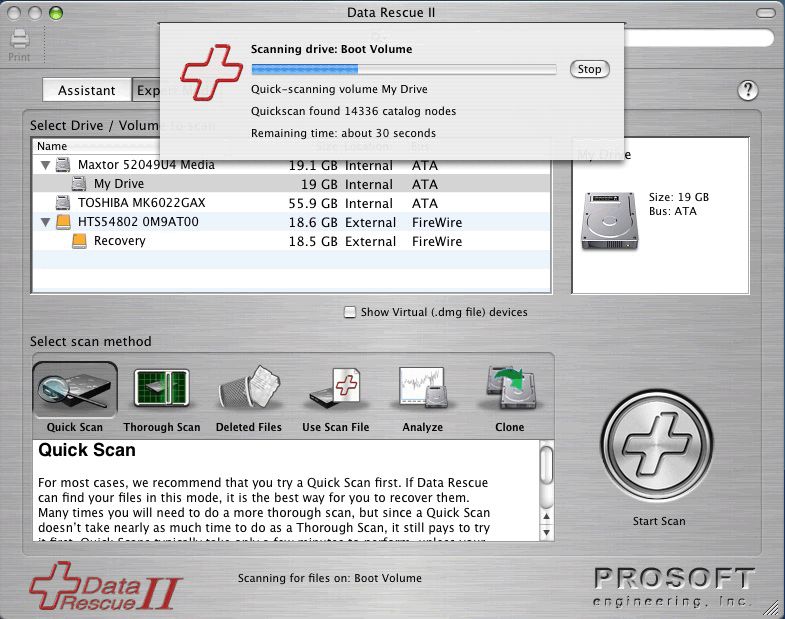
The upside to all of this is that in the wake of this calamity I've had the tremendous (mis)fortune of testing the latest crop of data recovery programs. Some time ago a client of mine had deleted some data, and back then there was only one contender for retrieving deleted files. The field seems to have matured, however, and now there are several. Disk Doctors Mac Data Recovery gets some good press, though I only kicked its tires myself. VirtualLab's Data Recovery also seemed to fare well in some cursory tests. There are even a handful of others out there of unknown quality and distinction. But for our calamity we turned to the oldest app I can recall in the field, the one I'd looked at for my client lo those many years ago: Data Rescue II, by ProSoft Engineering.

Data Rescue II: My Hero!

Should you ever have to undertake such a project, there are a few things you should know. First and foremost: the less you use the disk from which you want to recover data, the better your chances at recovery. See, erasing a file doesn't actually delete anything, it only marks the file as free for writing to. Writing to the drive increases the probability that deleted data will be overwritten. Once that happens you won't be able to recover the data. So your first step should always be to take the drive out of service, i.e. turn that shit off. And don't turn it back on until you're ready to recover the lost data.

In our case, the disk we were recovering from was a 1TB firewire hard drive. It being an external drive made our chances at recovery better, but its size meant we'd have to wait a while to even see if the data would be recoverable. Fortunately, Data Rescue II allows you to scan your drive in demo mode without purchasing the software. If it finds your files, you can then pay for the software (it costs $99 bucks) and recover the data.

Our scan took about 16 hours. We let it run overnight, and by early the next afternoon Data Rescue had found deleted files. In this process the file names get munged, so there was no way to tell for sure if these were in fact our deleted files, but the number and size seemed about right. We coughed up the dough, recovered the files (to a separate hard drive), and were happy to discover a near 100% recovery. There were a few files that were only partially recovered. These tended to be the oldest of the bunch which, yes, we have backups of. So we're saved! Oh happy day!

I can't help thinking that Apple's Burn Folder approach is fatally flawed. It's just not Mom-friendly. Perhaps it would work better if they made every file in the Burn Folder an alias. But it seems dubious at best to put burn functionality in the Finder without certain safeguards, and these safeguards are already present when the burning mechanism is separate from the file manager. The good news is that if you do happen to lose data by way of emptying the trash there are a number of options these days for recovering that data. And if you're quick and careful about it, your chances of success are pretty good.

Addendum:

For reference, or should the above-mentioned products fail to satisfy, here are some others I heard about but did not try:

Subrosa Software's File Salvage

Stellar Data Recovery's Macintosh Data Recovery

Boomerang Data Recovery Software (which looks suspiciously like the VirtualLab product)