Software Update Downloader

There are at least a few folks who are less than happy with Apple's decision to remove the option to download and keep updates from the Software Update application in Snow Leopard. I count myself among them.

Though the option may be gone from the GUI, however, it still exists in the command line version. Rob Griffiths solution is to use the command:

softwareupdate -d

There are a couple problems with this. The first is that the command, as listed in Mr. Griffiths article, doesn't do anything, at least not when I run it. From what I can tell the command requires the -a flag. So if you want it to actually work, it should look like:

softwareupdate -d -a

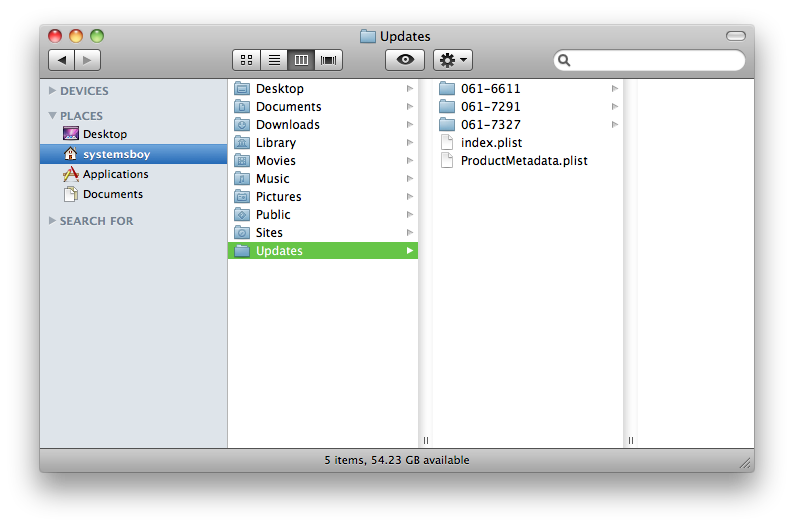
This will download everything you don't already have to a directory that the Software Update app can see (/Library/Updates). Now we're off to a more promising start.

The other problem with this method is that it doesn't offer a great deal of things you normally get with the GUI. In particular, as Pierre Igot points out, you don't get a progress indicator. Which really blows, I agree.

You also don't get prompted to install the updates once downloading has finished. To that end, I've written a little Automator Service. The service, when launched from any Services menu in any app, will prompt you to continue with this confirmation box:

Once you click OK, the download will begin. When the download is complete, the service will copy the new updates to an Updates folder at the top level your home account (~/Updates) for safe keeping.

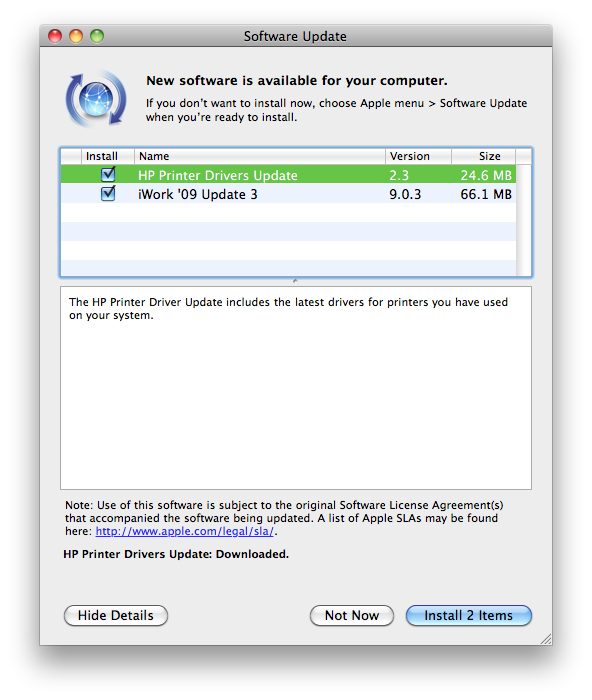
Once copying has finished, the Software Update app will launch and ask you if you want to install the updates you just downloaded. Just install as normal. Let Software Update do its business.

In the end everything will get installed and you'll be left with copies of all the updates in your home account for later use, all with only a single download.

While I can't really offer a progress bar, I like this better than the alternatives. It more closely approximates the old "Install and Keep" Software Update method than having to go and open the Terminal and do all that stuff as individual steps. And it's almost as user-friendly, being activated from a drop-down menu, just like Software Update usually is.

So here it is. The Software Update Download service:

Software Update Download Service

Download it, unstuff it and put it in ~/Library/Services. You should be able to launch it from the Services menu in any application.

A minor disclaimer: this service has mostly worked well for me, but there was one instance in which it seems to have had troubles. In particular, it seemed to choke on the latest iWork '09 updates. This may have been a fluke, or it may have had something to do with that particular update. I honestly don't know. But if you have troubles, let me know in the comments of this article. I'll do my best to figure out what's wrong as I'm using this in my own workflow. But consider this a beta at best; it's been through minimal testing.

Also, you should be able to open the workflow up in Automator and make adjustments to the behavior if you so please. Feel free to do so and let me know about it in the comments.

Enjoy!

A Time Machine Gotcha

Though Time Machine uses hard links to reference files from any point in time without using additional space, changing anything about a file will, obviously, trigger a new copy of said changed file to be backed up to your Time Machine disk. What's perhaps less obvious is that even simply changing the path to the file will trigger a new copy to be made.

This WIll Take a While

To wit: I have a very large folder — about 100GB — full of material that I intend to archive. That folder used to be called "BurnMe." But I recently changed my archiving approach such that the "BurnMe" moniker seemed inappropriate. So I renamed "BurnMe" to "ArchiveMe." My hope was that Time Machine would see that, yes, the folder had changed, but that its contents pointed to already existing files on disk, and that those files hadn't changed and could thus be referenced with a hard link.

Unfortunately, Time Machine isn't that smart. What it actually did was erase some older backups to make room, and then it indeed recopied the entire 100GB folder with the new name. Apparently, changing even the name of a file's enclosing folder counts as a change to the file and will trigger a new backup copy to be created.

Deleting a Backup

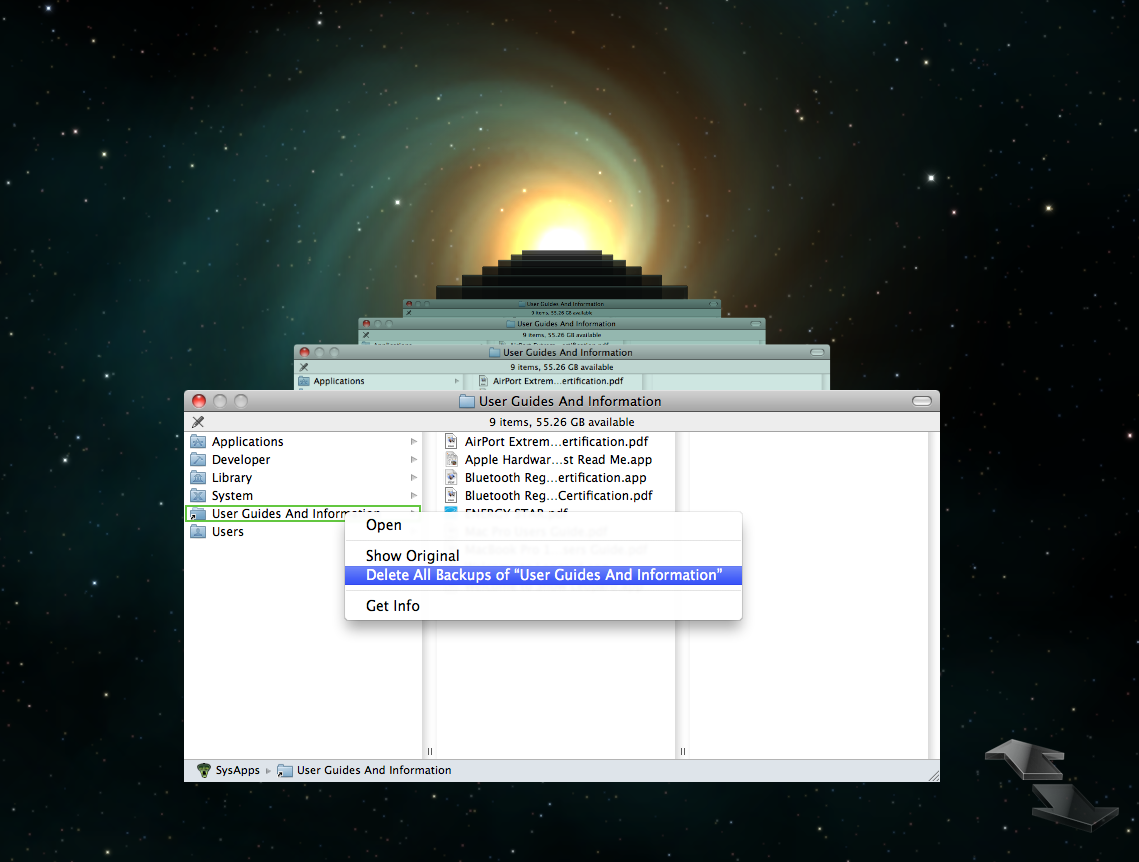
My solution to this problem, unfortunately, will be to manage my Time Machine data a bit. It is possible to delete previous Time Machine backups by entering into the interface and right-clicking the file or folder you want to delete, then choosing to "Delete All Backups" of the selected file or folder. From now on I will need to be mindful of name changes to large folders, and be sure and delete the previous backups before (or perhaps after, depending on available space) I do so.

In any case, this is not a huge problem, but it is a minor inconvenience in a process that is meant to be almost entirely hands-off.

Enclosing Mail Folders

A quickie: It's fairly common knowledge that, in the Finder, command-clicking the icon in the titlebar of the folder you're in will reveal the folder hierarchy that said folder lives in. This is a handy way to find your current location and "drill up" in the folder hierarchy, if you will.

I've always longed for similar functionality in Mail.app, but the best we'd had was titlebar text that displayed the email name and its enclosing folder. Until now.

In Snow Leopard Mail.app finally gets the same command-click behavior we have in the Finder (control-click also seems to work). Open a message in a new window, and command-click the icon of the message in the titlebar.

Doing so reveals the location of the message and allows you to navigate there.

Mail Hierarchy

Excellent!

My 2009 17" MacBook Pro

I recently switched from an 8-core Mac Pro desktop system to a new 17" MacBook Pro and I'm loving it.

The Switch

Video Toe-To-Toe Against the Mac Pro

My first concern making this switch was, would the MacBook Pro offer enough power to get my toughest work done. The answer so far has been yes.

Though I've been doing less video work — one of the changes that led me to this switch — I actually did get a fairly involved video project to work on for a friend. The project involved a good deal of compositing in Final Cut Pro, so it was a fairly resource-intensive affair. The MacBook Pro handled it with aplomb. I never once felt like I was working on an underpowered system. Final Cut performed just as well — which is to say sluggishly — as it did on my 8-core. Sure, rendering took a bit longer, but not as much as I'd expected, and not in any way that was a ever problem.

The 17" MacBook Pro's amazing screen really helped a lot too. What was even better, though, was hooking the MacBook Pro up to my secondary Cinema Display and working with dual-monitors. In this way, the MacBook Pro was actually a step up.

So, in a face off with my 8-core tower doing my toughest work, the new system passed with flying colors.

Size Matters

Another concern I had was whether or not I would really like the 17" model. I've always felt that the 15" was the ideal balance between usability and portability, but I opted for the 17" because I wouldn't be taking it out much and would be using it more as desktop replacement.

The Right Size

I'm rather surprised at how happy I am with the size. It certainly doesn't feel significantly heavier or bulkier than my old 15" PowerBook. A little, but not much. And it's fantastic around the house. Perfectly portable for moving between rooms.

Having the extra screen real estate is also wonderful, though the 1920x1200 resolution can get a bit tiresome on my aging eyes. This is more than made up for in brightness, however, which can be blinding (I had to turn it down for the photos). I'm also very happy I got the anti-glare screen. The treatment doesn't reduce the depth of the blacks nearly as much as I thought it would.

Overall the monitor is amazing, and I'm very happy with the size of the machine as a whole.

On Its Own Merits

In addition to being able to hold its own against my desktop system, and against my prior laptop experiences, there's a lot to love about the MacBook Pro in and of itself.

For one, I'm loving the new trackpad. There are things about this trackpad that I actually prefer over mousing, in particular, two-finger scrolling and the many other gestures that multi-touch offers. I sometimes miss those features now when I'm stuck using a standard mouse at work. This is one reason I'm so excited to try the Magic Mouse.

The battery life is quite good as reported. Like most folks I've read, I get about four straight hours of solid use, which is usually plenty. Any more than that and I should probably go sit at my desk anyway.

Battery Indicator

Now that I've set up my 802.11n wireless network, I'm quite happy with the general network speed of the machine. It's a huge improvement over 802.11g.

The uni-body construction really feels solid. In some ways it feels more solid than my tower, and certainly lacks the creakiness of the old PowerBook.

It also stays remarkably cool. My legs are loving it.

The keyboard is also great, as good as my tower's.

Excellent Keyboard

Odds And Ends

I bought my MacBook Pro with the DVI-to-Display Port adaptor offered by Apple. When you order this with your computer on Apple's site it comes in the sealed computer box as though it were an included item, not in a separate box of its own.

I actually rather like the Mini Display port. It's small and space-efficient, and much easier to handle and plug in than a DVI plug, believe it or not. And for the record, it's powering an ancient 23" plastic, easel-style Cinema Display hooked up to a ADC-to-DVI converter. Fun! And it works like a charm.

The monitors on these new-gen MacBooks no longer leave imprints on the screen. I can't tell you (or maybe I can) how annoying it was to have to have a screen protector at all times with my old PowerBook. So lame! A rubber grommet around the edge of the screen and problem solved!

The system came with a full install disc of Snow Leopard. Now I have three!

There Will Be Beefs

As close as this one comes, no system is perfect. There are always beefs.

I've mentioned the occasional difficulty with the monitor resolution, but my biggest beef is probably the fact that the keyboard is so far from the front edge of the computer. This, coupled with my second-biggest complaint, the fact that the unibody edges are so sharp, makes for some less-then-perfect text input. That sharp edge tends to cut at my wrists when I'm typing. Yes, it's a very minor quibble. And it's really the only one that's bothered me enough to write down.

Sharp!

Beyond that, I've had some system freezes on the new machine, but they seem to have mostly dissipated since installing the Performance Update from earlier this month.

And I guess I'd like to see more gesture programmability someday. But now I'm just grasping at straws.

Final Analysis

In case you can't tell. I'm quite enamored of my new 17" MacBook Pro. It's pretty much everything I want a computer to be: space-efficient yet powerful, comfortable and reliable. It's hard to imagine a better computer for someone like me.

The thing I like best about it, though, is that I can have everything — all my main rig data and all my laptop data — right there on a single system that is both portable and powerful. I can take it around with me everywhere I go and there it is. But plug it into the desktop monitor and hook up a couple firewire drives and I have a very functional, dual-monitor desktop rig that's just as comfortable and appropriate for video work as my desktop system ever was. It's like having all the power of a tower anywhere in the house.

Happy Computer User

The versatility of this system is what makes special, and I've been nothing but impressed. If you're ever thinking of making a similar switch, and your processing needs can handle it, I highly recommend the 17" MacBook Pro. It's everything you want in both a laptop and a desktop system.

And it's made me a much happier computer user.

Snow Leopard Scanner Application

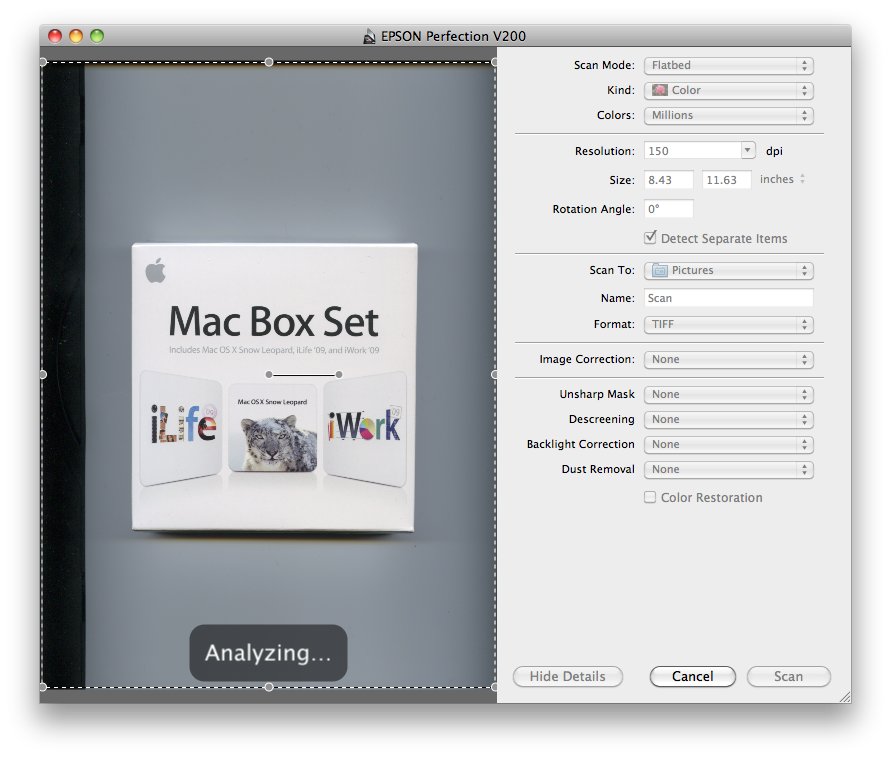
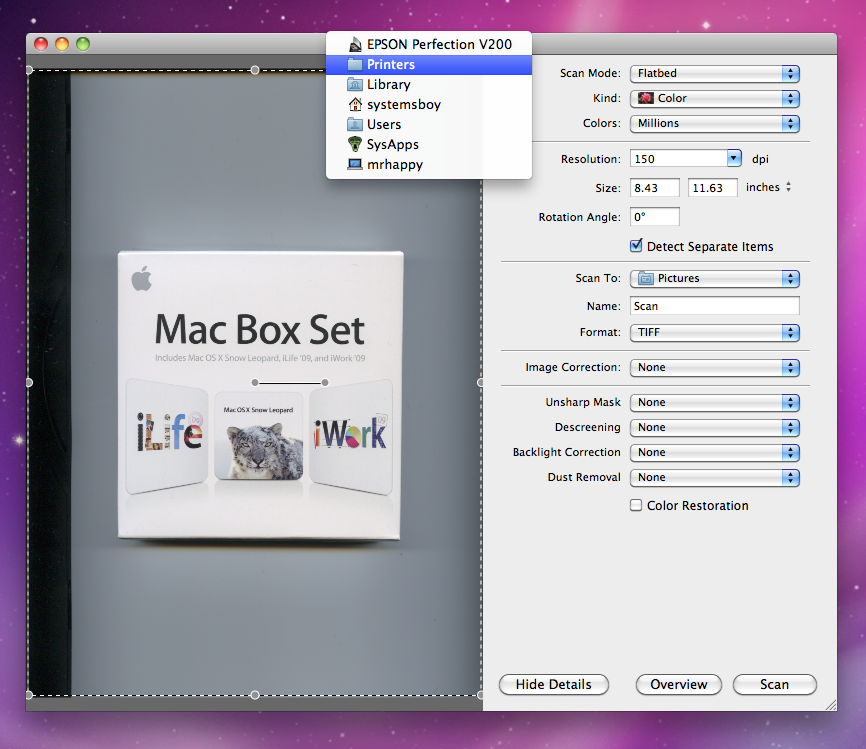
It's been widely reported that the Image Capture app in Snow Leopard can now see and scan from many common scanners. This is a huge boon to those of us who are sick and tired of crappy scanner drivers and software. Image Capture is quite a capable scanner app, and fairly Mac-like.

Scanner Joy!

But there's another, more direct way to access your scanner without opening Image Capture.

You Got Scanners in My Printers

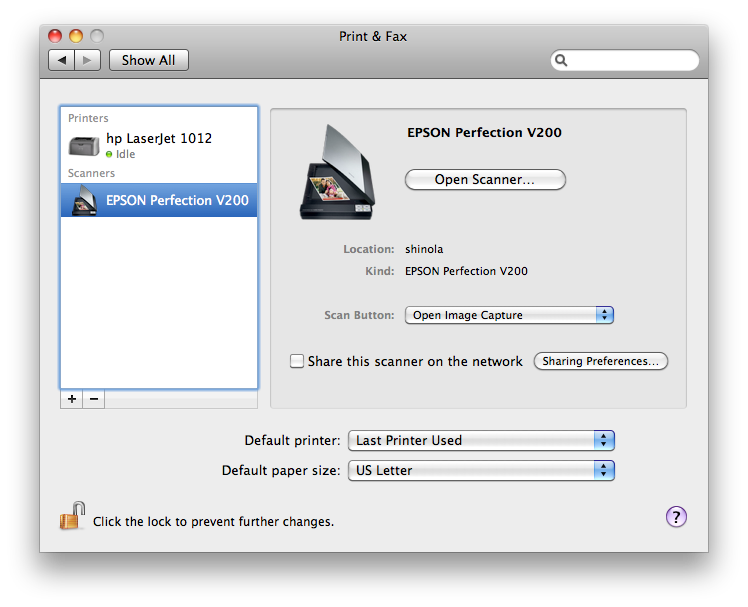
Just like with printers, adding a scanner (either via Image Capture or directly in your Print & Fax preference pane) will create a scanner application in ~/Library/Printers. This can be dragged directly to your Dock for quick, easy scanner access.

I Think We Should Call it Print, Fax & Scan

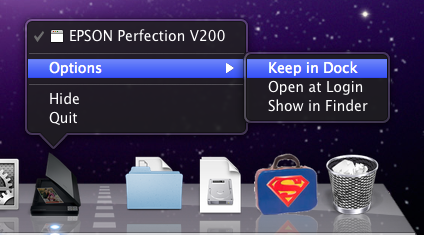
Or, if you open the scanner directly from the Print & Fax prefs, it will appear in the Dock where you can simply right-click it and choose to "Keep in Dock" from the options.

My Scanner in My Dock

All-in-all native scanning is an extremely handy feature and seems to work well in my tests. Keeping my scanner in my Dock just makes it that much easier to use.